Getting Started with DASF
For now DASF supports two application scenarios, python2python and typescript2python.
In case of python2python you ‘simply’ call a remote procedure (provided in python) from another python context. The typescript2python scenario basically does the same but introduces a context switch from the python based remote procedure to a web-based frontend. But let’s start with a simple python2python example first.
Remotely call a python procedure from a python context
Remote procedure calls (RPCs) consist of two parts: a server and a client side. In this context the server exposes a certain function which is can be called by the client side. In the scope of DASF the server side exposing certain functions is called backend module.
The backend module (server side)
Install DASF
The python package name of the DASF python bindings is called demessaging and is provided via pypi. You can install it via pip install demessaging[backend]
Let’s assume we have a python function that returns a HelloWorld string.
1def hello_world():
2  return 'HelloWorld'
In order to expose this function through a DASF backend module all we have to do is import and call the main function from the demessaging package and register all functions that you want to expose via __all__. So our example above becomes:
 1from demessaging import main
 2
 3
 4__all__ = ["hello_world"]
 5
 6
 7def hello_world() -> str:
 8    return 'HelloWorld'
 9
10
11if __name__ == "__main__":
12    main(
13        messaging_config=dict(topic="hello-world-topic")
14    )
Websocket Connection Parameters
The above example uses default connection values that will work with a local Apache Pulsar standalone Docker instance.
Consult the Pulsar documentation on how to setup custom values. In a nutshell:
the websocket port can be set in the pulsar config files, e.g. standalone.conf
the tenant and namespaces are setup through the pulsar admin interface (also see: https://pulsar.apache.org/docs/en/admin-api-tenants/#create)
In order to distinguish between different backend modules exposed through the same Pulsar instance you can create arbitrary tenant/namespace/topic combinations. Since topics are created on the fly, you might keep the tenant/namespace part static and register different backend modules via different topic names.
Now we simply start the module with
python hello_world_backend.py listen
That’s it, you exposed your first function through a DASF backend module. As a result you should see the following output:
connection attempt 1
connection to ws://localhost:8080/ws/v2/consumer/non-persistent/public/default/hello-world-topic/backend-module-2022-01-14T17:26:55 established
waiting for incoming request
Now it’s time to create the client side where we are going to call the exposed hello_world function.
The client side
Once we created our backend module we can use it to create the so called client stub. This is an auto-generated code stub that we can use in the client to call the functions exposed by the backend. For this we call:
python hello_world_backend.py generate >> hello_world_client_stub.py
Note
In case the backend module is already running/blocking the current terminal, you need to open a second one for this.
This will create a new file called hello_world_client_stub.py providing access to the hello_world() function exposed by the backend module. We now can use the client stub to call the function, e.g.
from hello_world_client_stub import hello_world

print(hello_world())
The execution of the above code should result in the following output:
connection to ws://localhost:8080/ws/v2/producer/non-persistent/public/default/hello-world-topic established
connection to ws://localhost:8080/ws/v2/consumer/non-persistent/public/default/hello-world-topic_UcribetS/python-backend-2022-01-14T18:11:06.768105 established
request successful
HelloWorld
That’s it, you just called your first remote function exposed through a DASF backend module.
Remotely call a python procedure from a typescript context
The visualization of data and algorithmic results are an integral part of data science.
Hence, DASF offers a web library called dasf-web, providing typescript bindings for the RPC messaging protocol, as well as some customizable visualization components.
The general goal is to connect the results from computational methods exposed by a backend module directly to visualization components in web-based context.
But for the sake of simplicity, let’s pick up the hello_world backend module from the previous example and create a web application calling the backend module and displaying the returned value.
Setup a web-application project
First we need to setup a web-application project. The visualization components provided by the dasf-web package are using Vuetify/Vuejs. If you also want to use them in your application you have to setup a Vuetify/Vuejs based web application. The dasf-web package is published via the NPM registry (https://www.npmjs.com/package/dasf-web). You can add it to your projects dependencies with npm i dasf-web --save.
Application template
In case you are setting up a web-application from scratch and you want to use DASF, you can also checkout our nuxtjs application template by cloning the following repository: Repository Link
The client stub
After setting up the web application, we need to create the client stub (analog to the python only scenario above) that interfaces with the backend module. In contrast to the python client stub DASF does not support the generation of typescript client stubs yet. So you have to do this yourself, but don’t worry, it’s actually quite simple.
 1import PulsarConnection from 'dasf-web/lib/messaging/PulsarConnection'
 2import { PulsarModuleResponse, PulsarModuleRequest, PulsarModuleRequestReceipt } from 'dasf-web/lib/messaging//PulsarMessages'
 3import { DefaultPulsarUrlBuilder } from 'dasf-web/lib/messaging//PulsarUrlBuilder'
 4
 5export default class HelloWorldClient {
 6  private pulsarConnection: PulsarConnection;
 7
 8  public constructor () {
 9    this.pulsarConnection = new PulsarConnection(new DefaultPulsarUrlBuilder('localhost', '8080', 'default', 'hello-world-topic'))
10  }
11
12  private createHelloWorldRequest (): PulsarModuleRequest {
13    const request = PulsarModuleRequest.createRequestMessage()
14    request.payload = btoa(JSON.stringify({ func_name: 'hello_world' }))
15
16    return request
17  }
18
19  public helloWorld (): Promise<string> {
20    return new Promise((resolve: (value: string) => void, reject: (reason: string) => void) => {
21      this.pulsarConnection.sendRequest(this.createHelloWorldRequest(),
22        (response: PulsarModuleResponse) => {
23          if (response.properties.status === 'success') {
24            resolve(JSON.parse(atob(response.payload)))
25          } else {
26            reject(atob(response.payload))
27          }
28        },
29        null,
30        (receipt: PulsarModuleRequestReceipt) => {
31          reject(receipt.errorMsg)
32        })
33    })
34  }
35}
Let’s break the shown client stub apart. First of all, we need to initialize a connection to the message broker.
This is done in the constructor (line 9) via the PulsarConnection and DefaultPulsarUrlBuilder classes, where you also provide the connection parameters for your backend module.
Connection Establishment
The connection to the message broker is established as soon as the connection class is instantiated.
In order to send an actual request, we have to create an instance of PulsarModuleRequest which we do in the createHelloWorldRequest function (line 12). There you also set the function name and the function parameters (in this example there are none). The function request parameters are then stored as a b64 string in the requests payload field.
Finally we have to submit the created request and wait for the response. We do this by calling the sendRequest function (line 21), providing the request we created before and a callback function that is triggered once the response or an error arrives. In order to account for the async part we use the Promise proxy in this example, but in general you can deal with the received response in whatever way you prefer. In the show example the promise is resolved in case a success response is received. The payload of the response is then decoded from b64 and parsed into an Javascript object (the exact reverse of what we did to create the initial request) and finally passed to the resolve function of the promise. In case we received an error response or a negative request receipt, we reject the promise and pass the corresponding error message.
The vue component
Now that we created the client stub, we can use it in our web front-end context, e.g. like so:
 1<template>
 2  <v-container
 3    style="margin-bottom: 35px; padding-top: 100px; padding-bottom: 20px"
 4  >
 5    <v-card :loading="response.length===0">
 6      <v-card-title>Hello World Example</v-card-title>
 7      <v-card-text>The hello world backend module responded with: <b>{{ response }}</b></v-card-text>
 8    </v-card>
 9  </v-container>
10</template>
11
12<script lang="ts">
13import { Component, Vue } from 'vue-property-decorator'
14import HelloWorldClient from '~/lib/HelloWorldClient'
15
16@Component({})
17export default class HelloWorldVis extends Vue {
18  protected response = '';
19
20  protected created (): void {
21    const hwClient: HelloWorldClient = new HelloWorldClient()
22
23    hwClient.helloWorld().then((moduleResponse: string) => {
24      this.response = moduleResponse
25    }).catch((reason) => {
26      this.response = reason
27    })
28  }
29}
30</script>
Here we create a minimalistic vue component/page showing the response of the hello world request through the HelloWorldClient client stub we created above.
In case you used our application template you can execute it via npm run dev (don’t forget to install the dependencies first via npm install).
The logging output during compilation will show you the localhost url to access the web page, e.g. http://localhost:3000/dasf-app-template/
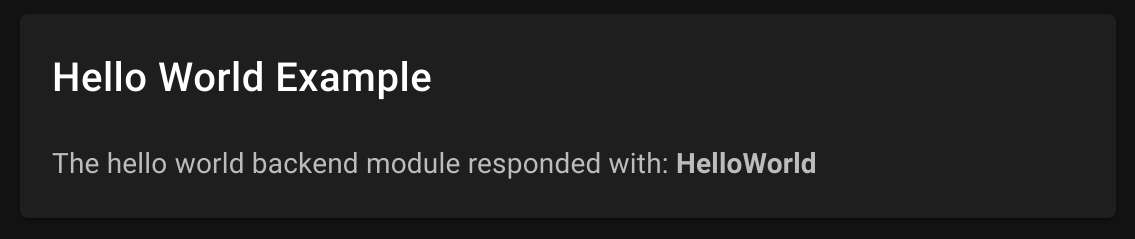
Depending on where you created your vue page, you will have to extend the url with the corresponding name. Assuming we put the HelloWorldVis under pages/hello-world.vue, you have to browse to http://localhost:3000/dasf-app-template/hello-world to open your hello world vue component. It should show a card stating the response text of the hello world backend module, e.g. like so:
That’s it as far as the minimal hello world example goes. For more elaborate examples checkout the corresponding guides in the usage section.
You find the source code of the shown example in the following repository: https://codebase.helmholtz.cloud/dasf/demos/dasf-full-example